kubernetes集群使用容器镜像仓库Harbor

Kubernetes集群使用容器镜像仓库Harbor 一、容器镜像仓库Harbor部署 1.1 在docker主机部署harbor 1.1.1 dockerce安装 1.1.1.1 获取YUM源 使用…

kubernetes集群使用容器镜像仓库Harbor

Kubernetes集群使用容器镜像仓库Harbor

一、容器镜像仓库Harbor部署

1.1 在docker主机部署harbor

1.1.1 docker-ce安装

1.1.1.1 获取YUM源

使用阿里云开源软件镜像站。

1
# wget https://mirrors.aliyun.com/docker-ce/linux/centos/docker-ce.repo -O /etc/yum.repos.d/docker-ce.repo

1.1.1.2 安装并设置启动及开机自启动

1
# yum -y install docker-ce
1
# systemctl enable --now docker

1.1.2 docker compose安装

1
2
下载docker-compose二进制文件
# wget https://github.com/docker/compose/releases/download/1.25.0/docker-compose-Linux-x86_64
1
2
3
查看已下载二进制文件
# ls
docker-compose-Linux-x86_64
1
2
移动二进制文件到/usr/bin目录,并更名为docker-compose
# mv docker-compose-Linux-x86_64 /usr/bin/docker-compose
1
2
为二进制文件添加可执行权限
# chmod +x /usr/bin/docker-compose
1
2
3
4
5
6
安装完成后,查看docker-compse版本
# docker-compose version
docker-compose version 1.25.0, build 0a186604
docker-py version: 4.1.0
CPython version: 3.7.4
OpenSSL version: OpenSSL 1.1.0l 10 Sep 2019

1.1.3 获取harbor安装文件

image-20220125232445910

image-20220125232519365

image-20220614112423090

image-20220614112444701

image-20220614112508085

image-20220614112527380

1
2
下载harbor离线安装包
# wget https://github.com/goharbor/harbor/releases/download/v2.5.1/harbor-offline-installer-v2.5.1.tgz
1
2
3
查看已下载的离线安装包
# ls
harbor-offline-installer-v2.5.1.tgz

1.1.4 修改配置文件

1
2
解压harbor离线安装包
# tar xf harbor-offline-installer-v2.5.1.tgz
1
2
3
查看解压出来的目录
# ls
harbor
1
2
3
查看harbor目录
# ls harbor
common.sh harbor.v2.5.1.tar.gz harbor.yml.tmpl install.sh LICENSE prepare
1
2
3
创建配置文件
# cd harbor/
# mv harbor.yml.tmpl harbor.yml
1
2
3
4
5
6
7
8
9
10
11
12
13
14
15
16
17
18
19
20
21
22
23
24
25
26
27
28
29
30
31
32
33
34
35
36
37
38
39
修改配置文件内容

# vim harbor.yml

# Configuration file of Harbor

# The IP address or hostname to access admin UI and registry service.
# DO NOT use localhost or 127.0.0.1, because Harbor needs to be accessed by external clients.
hostname: 192.168.10.250

# http related config
http:
# port for http, default is 80. If https enabled, this port will redirect to https port
port: 80

# https related config
# https:
# https port for harbor, default is 443
# port: 443
# The path of cert and key files for nginx
# certificate: /root/harbor/6864844_kubemsb.com.pem
# private_key: /root/harbor/6864844_kubemsb.com.key

# # Uncomment following will enable tls communication between all harbor components
# internal_tls:
# # set enabled to true means internal tls is enabled
# enabled: true
# # put your cert and key files on dir
# dir: /etc/harbor/tls/internal

# Uncomment external_url if you want to enable external proxy
# And when it enabled the hostname will no longer used
# external_url: https://reg.mydomain.com:8433

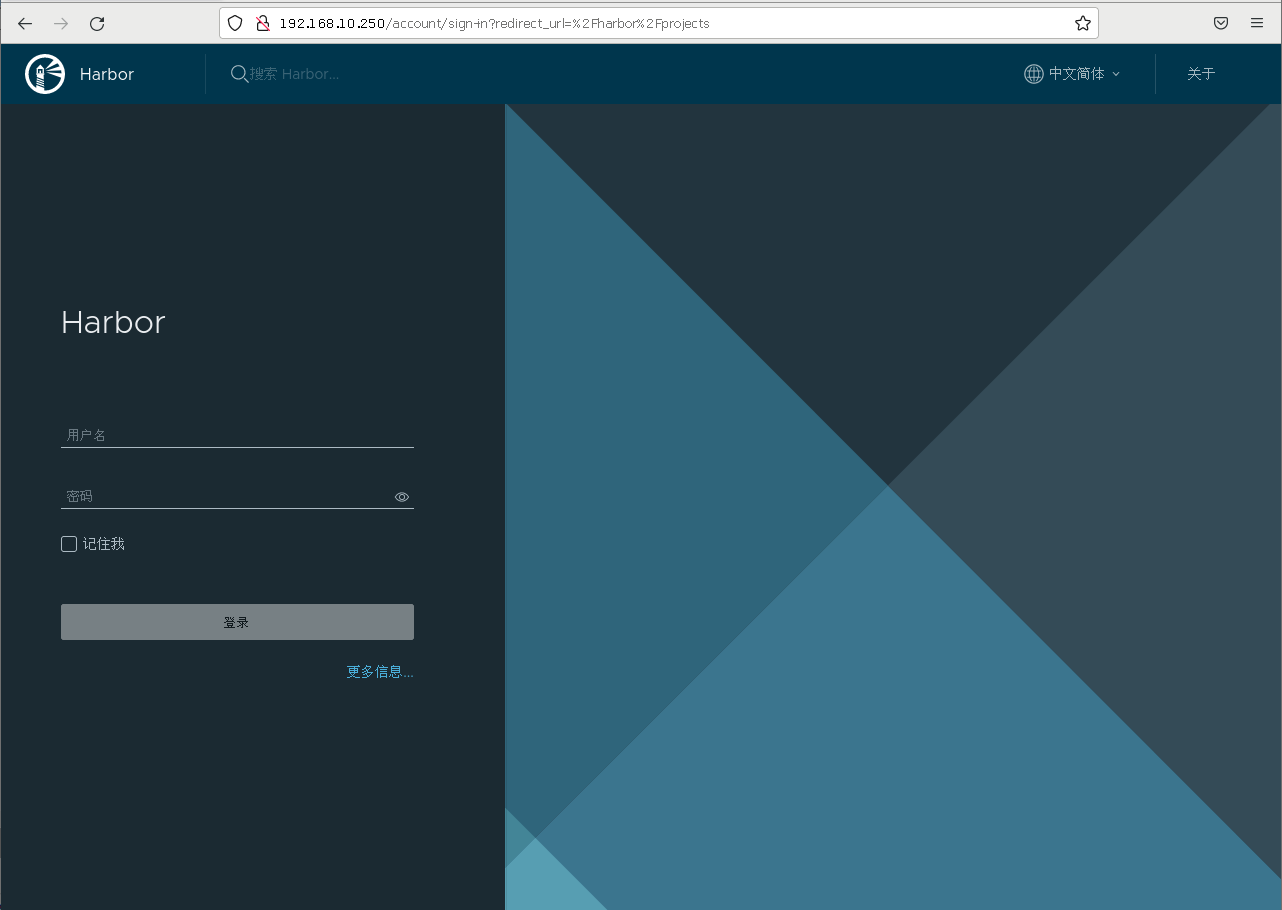
# The initial password of Harbor admin
# It only works in first time to install harbor
# Remember Change the admin password from UI after launching Harbor.
harbor_admin_password: 12345 访问密码
......

1.1.5 执行预备脚本

1
# ./prepare
1
2
3
4
5
6
7
8
9
10
11
12
13
14
15
16
17
18
19
20
21
输出
prepare base dir is set to /root/harbor
Clearing the configuration file: /config/portal/nginx.conf
Clearing the configuration file: /config/log/logrotate.conf
Clearing the configuration file: /config/log/rsyslog_docker.conf
Generated configuration file: /config/portal/nginx.conf
Generated configuration file: /config/log/logrotate.conf
Generated configuration file: /config/log/rsyslog_docker.conf
Generated configuration file: /config/nginx/nginx.conf
Generated configuration file: /config/core/env
Generated configuration file: /config/core/app.conf
Generated configuration file: /config/registry/config.yml
Generated configuration file: /config/registryctl/env
Generated configuration file: /config/registryctl/config.yml
Generated configuration file: /config/db/env
Generated configuration file: /config/jobservice/env
Generated configuration file: /config/jobservice/config.yml
Generated and saved secret to file: /data/secret/keys/secretkey
Successfully called func: create_root_cert
Generated configuration file: /compose_location/docker-compose.yml
Clean up the input dir

1.1.6 执行安装脚本

1
# ./install.sh
1
2
3
4
5
6
7
8
9
10
11
12
13
14
15
16
17
18
19
20
21
22
23
24
25
26
27
28
输出
[Step 0]: checking if docker is installed ...

Note: docker version: 20.10.12

[Step 1]: checking docker-compose is installed ...

Note: docker-compose version: 1.25.0

[Step 2]: loading Harbor images ...

[Step 3]: preparing environment ...

[Step 4]: preparing harbor configs ...
prepare base dir is set to /root/harbor

[Step 5]: starting Harbor ...
Creating network "harbor_harbor" with the default driver
Creating harbor-log ... done
Creating harbor-db ... done
Creating registry ... done
Creating registryctl ... done
Creating redis ... done
Creating harbor-portal ... done
Creating harbor-core ... done
Creating harbor-jobservice ... done
Creating nginx ... done
----Harbor has been installed and started successfully.----

1.1.7 验证运行情况

1
2
3
4
5
6
7
8
9
10
11
12
# docker ps
CONTAINER ID IMAGE COMMAND CREATED STATUS PORTS NAMES
71c0db683e4a goharbor/nginx-photon:v2.5.1 "nginx -g 'daemon of…" About a minute ago Up About a minute (healthy) 0.0.0.0:80->8080/tcp, :::80->8080/tcp, 0.0.0.0:443->8443/tcp, :::443->8443/tcp nginx
4e3b53a86f01 goharbor/harbor-jobservice:v2.5.1 "/harbor/entrypoint.…" About a minute ago Up About a minute (healthy) harbor-jobservice
df76e1eabbf7 goharbor/harbor-core:v2.5.1 "/harbor/entrypoint.…" About a minute ago Up About a minute (healthy) harbor-core
eeb4d224dfc4 goharbor/harbor-portal:v2.5.1 "nginx -g 'daemon of…" About a minute ago Up About a minute (healthy) harbor-portal
70e162c38b59 goharbor/redis-photon:v2.5.1 "redis-server /etc/r…" About a minute ago Up About a minute (healthy) redis
8bcc0e9b06ec goharbor/harbor-registryctl:v2.5.1 "/home/harbor/start.…" About a minute ago Up About a minute (healthy) registryctl
d88196398df7 goharbor/registry-photon:v2.5.1 "/home/harbor/entryp…" About a minute ago Up About a minute (healthy) registry
ed5ba2ba9c82 goharbor/harbor-db:v2.5.1 "/docker-entrypoint.…" About a minute ago Up About a minute (healthy) harbor-db
dcb4b57c7542 goharbor/harbor-log:v2.5.1 "/bin/sh -c /usr/loc…" About a minute ago Up About a minute (healthy) 127.0.0.1:1514->10514/tcp harbor-log

1.1.8 访问harbor UI界面

image-20220614121150040

image-20220614121218531

1.2 在kubernetes集群中部署harbor

由于涉及后面技术内容,例如: pv、pvc、helm等,后期内容做介绍。

二、Kubernetes集群使用harbor仓库

2.1 通过secret使用harbor仓库

2.1.1 新建一个harbor私有仓库

image-20220614121936871

image-20220614122029572

2.1.2 kubernetes集群所有节点配置harbor仓库

1
2
3
4
5
6
7
# vim /etc/docker/daemon.json

{
"insecure-registries": ["http://192.168.10.250"]
}

# systemctl restart docker

2.1.3 上传nginx测试镜像到harbor

docker-compose down停止harbor,修改后再启动。

1
2
3
4
[root@harbor ~]# cat /etc/docker/daemon.json
{
"insecure-registries": ["http://192.168.10.250"]
}
1
[root@harbor ~]# systemctl restart docker
1
2
3
4
5
6
7
8
9
10
11
12
13
14
15
[root@harbor ~]# docker pull nginx:1.15-alpine


[root@harbor ~]# docker login 192.168.10.250
Username: admin
Password: 这里密码是12345
WARNING! Your password will be stored unencrypted in /root/.docker/config.json.
Configure a credential helper to remove this warning. See
https://docs.docker.com/engine/reference/commandline/login/#credentials-store


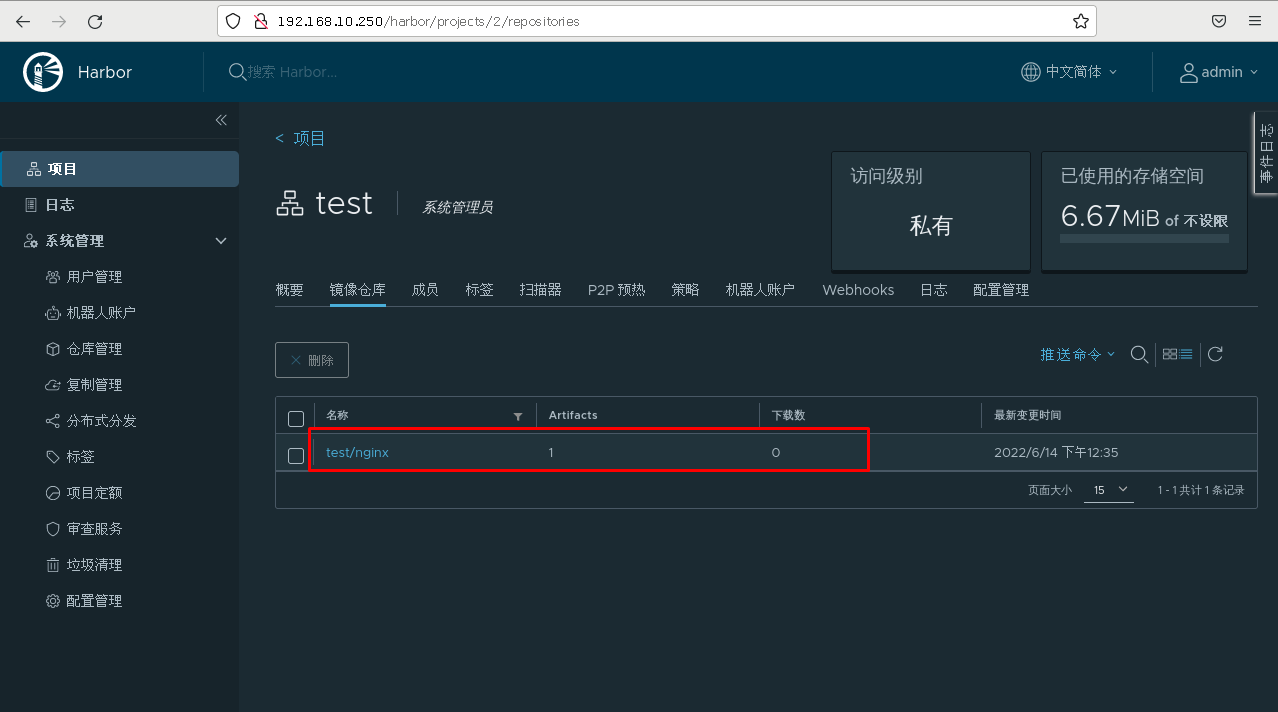
[root@harbor ~]# docker tag nginx:1.15-alpine 192.168.10.250/test/nginx:v1

[root@harbor ~]# docker push 192.168.10.250/test/nginx:v1

image-20220614123555567

2.1.4 创建docker-registry类型secret

1
[root@k8s-master1 ~]# kubectl create secret docker-registry harbor-secret --docker-server=192.168.10.250 --docker-username=admin --docker-password=12345

说明:

  • 类型为docker-registry
  • –docker-server指定harbor仓库的IP
  • –docker-username指定harbor仓库的登录用户名
  • –docker-password指定harbor仓库的登录密码

验证查看

1
2
[root@k8s-master1 ~]# kubectl get secret |grep harbor-secret
harbor-secret kubernetes.io/dockerconfigjson 1 19s
1
2
3
4
5
6
7
8
9
10
11
[root@k8s-master1 ~]# kubectl describe secret harbor-secret
Name: harbor-secret
Namespace: default
Labels: <none>
Annotations: <none>

Type: kubernetes.io/dockerconfigjson

Data
====
.dockerconfigjson: 94 bytes

2.1.5 创建pod并使用secret

1
2
3
4
5
6
7
8
9
10
11
[root@k8s-master1 ~]# vim pod-harbor.yml
apiVersion: v1
kind: Pod
metadata:
name: pod-harbor
spec:
containers:
- name: c1
image: 192.168.10.250/test/nginx:v1
imagePullSecrets: # 定义镜像下载使用的secrets
- name: harbor-secret # 与上面的secret一致
1
2
[root@k8s-master1 ~]# kubectl apply -f pod-harbor.yml
pod/pod-harbor created

2.1.6 验证pod

1
2
3
4
5
6
7
8
9
10
11
[root@k8s-master1 ~]# kubectl describe pod pod-harbor
Events:
Type Reason Age From Message
---- ------ ---- ---- -------
Normal Scheduled 16s default-scheduler Successfully assigned default/pod-harbor to k8s-worker1
Normal Pulling 15s kubelet Pulling image "192.168.10.250/test/nginx:v1"
Normal Pulled 14s kubelet Successfully pulled image "192.168.10.250/test/nginx:v1" in 630.869309ms
Normal Created 14s kubelet Created container c1
Normal Started 14s kubelet Started container c1

可以看到是从192.168.10.250/test/nginx:v1拉取的镜像

2.2 通过serviceaccout使用harbor仓库

2.2.1 设为serviceaccount默认规则

如果每次编写yaml文件都需要添加imagePullSecrets这2行配置,有点麻烦, 有没有在不需要添加这2行配置就可以实现下载harbor仓库里面的镜像呢?答案是有的,可以把secret配置到serviceAccount中即可。

2.2.2 创建serviceaccount及应用过程

  1. 创建serviceaccount
1
2
3
4
5
6
7
8
9
10
11
12
[root@k8s-master1 ~]# vim serviceaccount-harbor-sa.yaml
apiVersion: v1
kind: ServiceAccount
metadata:
name: harbor-sa
namespace: default

[root@k8s-master1 ~]# kubectl apply -f serviceaccount-harbor-sa.yaml
serviceaccount/harbor-sa created

[root@k8s-master1 ~]# kubectl get sa |grep harbor-sa
harbor-sa 1 14s

2.修改serviceaccount添加使用harbor-secret

1
2
3
4
5
6
7
8
9
[root@k8s-master1 ~]# kubectl describe serviceaccount harbor-sa
Name: harbor-sa
Namespace: default
Labels: <none>
Annotations: <none>
Image pull secrets: <none>
Mountable secrets: harbor-sa-token-thxwq
Tokens: harbor-sa-token-thxwq
Events: <none>
1
2
3
4
5
6
7
8
9
10
11
12
13
14
15
16
17
18
19
[root@k8s-master1 ~]# kubectl patch serviceaccount harbor-sa -n default  -p '{"imagePullSecrets": [{"name": "harbor-secret"}]}'
serviceaccount/harbor-sa patched

[root@k8s-master1 ~]# kubectl describe serviceaccount harbor-sa
Name: harbor-sa
Namespace: default
Labels: <none>
Annotations: <none>
Image pull secrets: harbor-secret
Mountable secrets: harbor-sa-token-thxwq
Tokens: harbor-sa-token-thxwq
Events: <none>

[root@k8s-master1 ~]# kubectl get serviceaccount harbor-sa -o yaml
apiVersion: v1
imagePullSecrets:
- name: harbor-secret # 确认,通过patch方式更新了
kind: ServiceAccount
......

3.修改yaml使用serviceAccount

1
2
3
4
5
6
7
8
9
10
[root@k8s-master1 ~]# vim pod-harbor.yml
apiVersion: v1
kind: Pod
metadata:
name: pod-harbor
spec:
serviceAccount: harbor-sa # 原来的2句换成使用harbor-sa这个serviceAccount
containers:
- name: c1
image: 192.168.122.18/test/nginx:v1
  1. 删除先前的重新创建pod验证
1
2
3
4
5
6
7
8
9
[root@k8s-master1 ~]# kubectl delete pod pod-harbor
pod "pod-harbor" deleted

[root@k8s-master1 ~]# kubectl apply -f pod-harbor.yml
pod/pod-harbor created

[root@k8s-master1 ~]# kubectl get pods
NAME READY STATUS RESTARTS AGE
pod-harbor 1/1 Running 0 8s
1
2
3
4
5
6
7
8
9
[root@k8s-master1 ~]# kubectl describe pods pod-harbor
Events:
Type Reason Age From Message
---- ------ ---- ---- -------
Normal Scheduled 13s default-scheduler Successfully assigned default/pod-harbor to k8s-worker2
Normal Pulling 13s kubelet Pulling image "192.168.10.250/test/nginx:v1"
Normal Pulled 12s kubelet Successfully pulled image "192.168.10.250/test/nginx:v1" in 731.788686ms
Normal Created 12s kubelet Created container c1
Normal Started 12s kubelet Started container c1

补充: serviceAccount可以实现不同namespace下载镜像使用访问harbor账号的不同。


kubernetes集群使用容器镜像仓库Harbor
https://www.tiantian123.asia/2025/12/25/kubernetes集群使用容器镜像仓库Harbor/
作者
lht
发布于
2025年12月25日
许可协议